- View Mobile Number
thebharatgroup@gmail.com
Rubber Testing Equipment
Leading Manufacturers, Exporters and Wholesaler of Compressibility Recovery Tester, Demattia Flex Tester, Hot Air Oven, Rotary Drum Din Abrasion Tester, Rubber Tensile Tester and Specific Gravity Balance from Faridabad.
| Business Type | Manufacturer, Exporter, Supplier |
| Power Source | Electric |
| Country of Origin | India |
| Warrenty | 1year |
| Digital Dials | 0 to 10 mm X 0.001 mm least count or LVDT |
| Load Cell | 1500 N |
| Motor | ½ Hp 3 Phase Induction Motor |
| Power | 500 W, 220 Vac Single Phases |
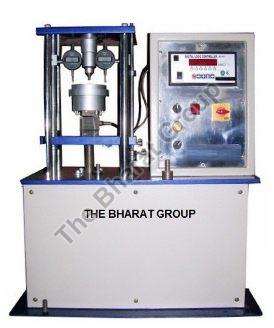
TBG Compressibility and Recovery Tester of Gasket Material Consist of an Anvil- A hardened and ground surface on which the sample is placed. There are a set of steel cylindrical shape penetrators of specified sizes and shape according to the material test. There are two dials also mounted on the anvil for the measurement of the thickness of the test specimen at the time of preloading and the total load. There are two digital dials so that by taking the average value you can measure the accurate thickness.
There is the software in the load monitor for the application of preload and major load for the specified period after that buzzer give the indication to note the dial gauge reading.
Preload – A preload which shall include the weight of the penetrator itself and added weight of the penetrator itself and added weights to give the value specified within ± 1%. Preloads for various types of gasket materials are as shown in Table 1, unless otherwise specified.
There is a selector switch on the control panel for the setting of load conditions as given below.
- Mode 1= pre-load 22.2 N & total load 1112 N
- Mode 2= pre-load 4.4 N & total load 222 N
- Mode 3= pre-load 4.4 N & total load 445 N
- Mode 4= pre-load 4.4 N & total load 356 N
There are two process of movement of the penetrator that is manual and other is auto. For testing purpose as per modes always use auto mode and for the movement of the penetrator always use manual. In manual mode for up and down movement first of all press the rotary switch for the up or down position and than in manual mode. And for AUTO mode switch off the digital monitor then select the mode and change the penetrator as per requirements then switch on the digital monitor. For testing place the test specimen on the anvil and then press the push to test switch.
All the parts are either painted/powder coating chrome plating for corrosion resistance long life.
| Business Type | Manufacturer, Exporter, Supplier |
| Finishing | Polished |
| Power Source | Electric |
| Country of Origin | India |
| Number of Test Specimens Tested | 6 or 12 (Six or Twelve) |
| Maximum Opening Between Grips | 75mm (adjustable) |
| Travel of Reciprocating Grip | 57.15mm (adjustable) |
| Flexing Frequency | 300cpm |
| Motor | ¼HP single phase 230 V AC |
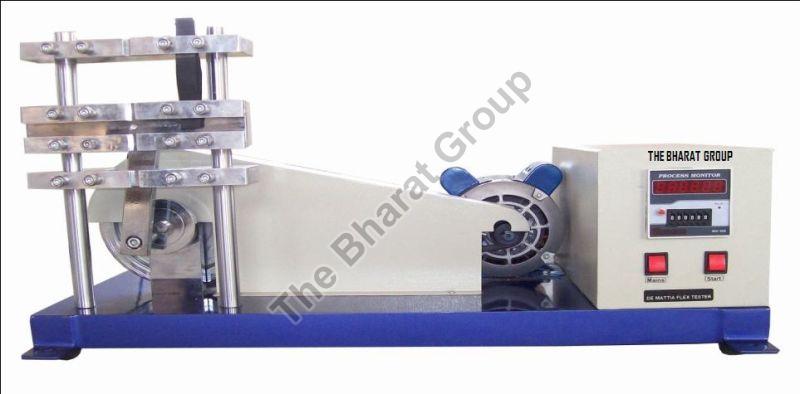
De-Mattia Flex Tester has a set of grips to hold test specimens in two tiers with their holding faces lying in the same vertical plane. Holding one end of the test specimen in a fixed grip and the other end in a reciprocating grip provides the flexing and unflexing action. The set of grip has two-fixed grip and one large reciprocating grip positioned between them in order to flex half of the test specimen while the other half is being unflexed. The reciprocating grip is slide on hardened and ground rods made of high carbon steel. The reciprocating motion is provided by an eccentric and linkage mechanism driven by an electric motor through V-belt and pulleys. A six digit electronic counter is provided for indicating the number of the test cycles undergone.
The equipment is build on a rigid fabricated base plate and finished in metallic painting and bright chrome/zinc plating to give it a corrosion resistant finish. Moulding dies for preparing test specimen, and jig and punch assembly for making initial crack in test specimen for crack growth test are available as optional accessories.
| Business Type | Manufacturer, Exporter, Supplier |
| Material | Metal |
| Driven Type | Electric |
| Color | Grey, Blue |
| Power | 1-5kw |
| Certification | CE Certified |
| Voltage | 220V |
| Warranty | 1 Year |
| Country of Origin | India |
Determination of effect of ageing on various physical properties of different materials may be carried out by heating the material under test inside an air oven so that the effects of long term ageing are reproduced within a much shorter duration of time for this determination, physical properties of the material under test are determined before ageing and ageing the test specimen at the specified temperature for a set duration of time and subsequent to the room temperature before conducting the tests again.
Determination of various physical characteristics of different materials and products at elevated temperature may be carried out by heating the test specimen to the appropriate temperature inside a constant temperature air oven and determining the required characteristics with the specimen kept under the same temperature. For this purpose the equipment needed for conducting the determination can either be kept inside the oven along with the test specimen, or if this is not feasible because of certain constrains, by taken the heated specimen out from the oven and conduction the test in still air within the shortest possible span of time.
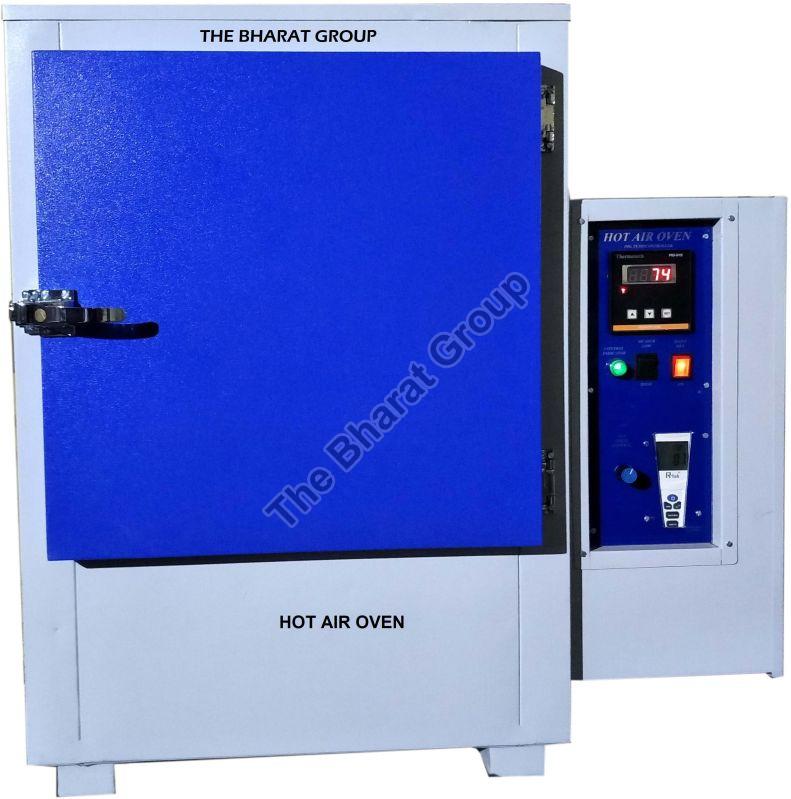
The TBG hot air Oven has a test chamber of double walled construction. The inner walls are made of stainless steel sheet and outer walls of CRCA sheet. The space between the two walls is filled with mineral wool for insulation. The chamber is fitted with two adjustable perforated shelves for keeping the test specimen or the test equipment on.
The oven is heated electrically with the help of heaters placed in ribs on the bottom and sides of the chamber. (An air circulating fan is provided on the back of the chamber for even temperature distribution) the temperature inside the test chamber is indicated and controlled by digital temperature controller.
The chamber is provided with two ports with adjustable openings for enabling natural change of air inside it by convection. These ports can also be used for providing electrical access to the test specimen kept inside the oven, if so desired.
TECHNICAL DATA
- Range of temperature : Ambient to 250ºC × 1 ºC Least count
- Inner Size Available (in Inch): 18 x 18 x 18
- With Digital Temperature Control
- With Inner SS & Outer powder coated
- With Air circulating Fan
- With Operating manual (English)
| Business Type | Manufacturer, Exporter, Supplier |
| Country of Origin | India |
| Dimensions of the Specimen | 16mm diameter with minimum height of 6 |
| Dimensions of Rotating Drum | 150 mm diameter with x about 460 mm long |
| Speed of Rotation of Drum | 40 rpm |
| Lateral Movement of Test Specimen Holder | 4.2 mm per revolution of drum |
| Rotation of Test Specimen | 1 revolution per 50 revolutions of drum |
| Load On Test Specimen | 5/10N |
| Total Length of Abrasion Run | 40 meters (about 84 revolutions) |
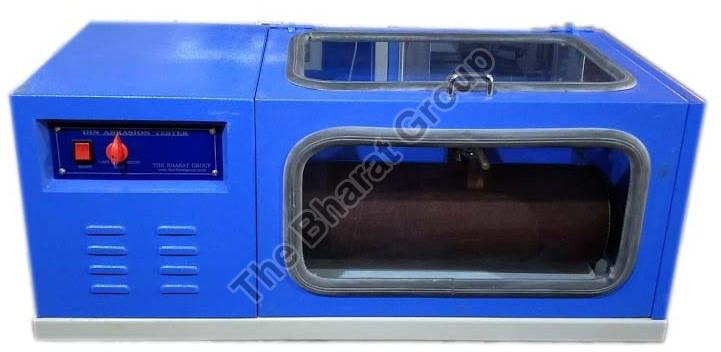
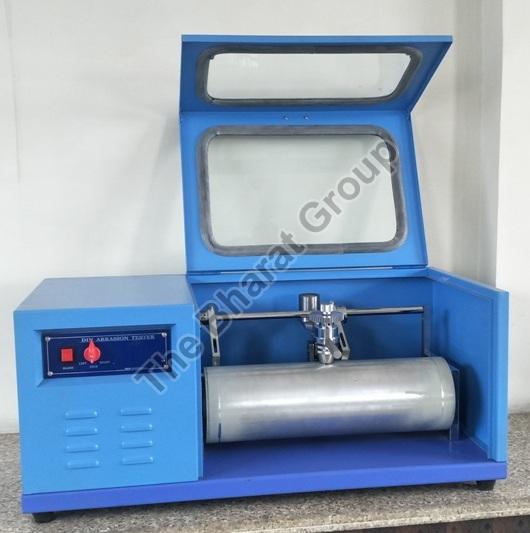
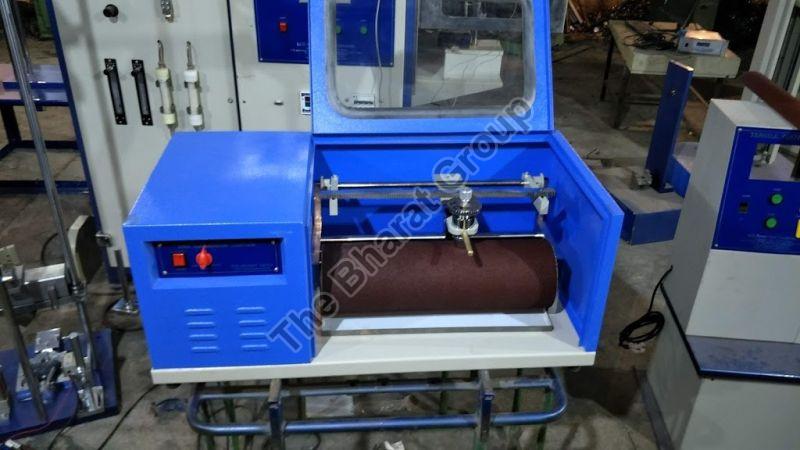
In Din method of determine abrasion resistance of vulcanized natural or synthetic, a cylindrical rubber test specimen is abraded against an abrasive surface mounted on a rotating cylindrical drum in such a manner that abrasion takes place on one of the flat ends of the test specimen which is held against the abrasive surface under a specified load while being traversed across it. The ratio of the volume loss of a standard rubber to the volume loss of the test rubber measured under the same conditions, expressed as a percentage, gives the abrasion resistance index of the rubber under test.
Din Abrasion Tester is designed to determine abrasion resistance index of natural and synthetic rubber in accordance with the above principle. It consists of test specimen holder with a cylindrical opening adjustable between 15.5 to 16.3 mm to clamp the test specimen with an arrangement to adjust the length of test specimen protruding out. The holder is mounted by a screw mechanism along a length of a rotating drum on which the abrasive cloth is fixed. The movement to the screw mechanism and drum is given by an electric motor, gearbox and chain mechanism to give the specified speed of rotation to the drum and the specified lateral movement to the test specimen holder. The swivel arm and test specimen holder are so disposed that the test specimen is pressed against the drum under the specified load with its centre axis at an inclination of 3 degree to the perpendicular in the direction of rotation and placed above the longitudinal axis of drum. A rack and pinion arrangement to rotate the test specimen about its axis during the test (whenever desired) is also provided.
The abrasive cloth is firmly fixed to the drum using a suitable peel able adhesive with the ends of the abrasive cloth butt jointed together. The equipment is provided with limit switches which, in addition of giving over travel safety to the movement of test holder by preventing the lower edge of the test specimen holder to touch the abrasive cloth.
The equipment is built on rigid steel base and finished in grey metallic and bright chrome / zinc plating to give it a corrosion resistant finish. Moulding die, rotary type cutting die(hollow drill) for preparing test specimens and extra abrasive cloth are available as optional accessories.
| Business Type | Manufacturer, Exporter, Supplier |
| Country of Origin | India |
| Range | 500 Kg |
| Least Count | 0.1 kg |
| Elongations | 25 to 900mm |
| Traverse Speed | Variable speed 50 to 500mm/min |
| Motor | 1 Hp, 1425 rpm, Induction motor |
| Power Required | 220 VAC, 50Hz, 1000w, single phase |
| Unit Changing | N, Kn, Kg, G |
Tensile strength and elongation are the two prime characteristics of most of the raw materials, whether they are metals: or non-metals: such as foam, rubber, textiles, plastic, paper: or finished products such as rods, wires, ropes, yarns, belts etcetera. These properties very often play the major role in determining the suitability of any raw material for any specific application. It is therefore, of utmost importance to determine these characteristics accurately, conveniently, and quickly.
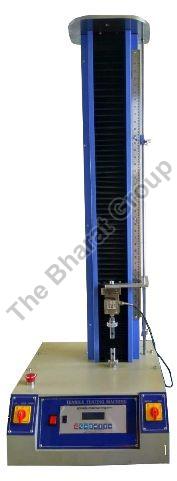
Tensile Testing Machine provides a relatively inexpensive way for determining the tensile strength and elongation of variety of raw materials such as rubber, leather, fabric, plastics, Belts, wires etcetera. They are based on constant rate of traverse principle in which one end of the test specimen is held in a stationary grip, while the other end is made to move at a known fixed speed with the help of motor, gearbox and screw arrangement. The load exerted on the stationary grip is sensed by a load cell and indicated by a digital load indicator. The controller is microprocessor based and has the facility of over load protection, peak hold and auto calibration. The load directly indicated in kilograms or Newton.
The elongation of the test specimen is measured on a digital indicator fixed on the frame of the tester, which indicates the distance between the grips. The frame of the tester fabricated from heavy mild steel sections to give the required rigidity and strength. Various built in safety arrangements such as over travel protection are provided.
The tester is finished in metallic painting and bright chrome| zinc plating to give the apparatus a corrosion resistant finish. It is supplied complied which electrical. Which include micro-, switches, Push buttons, and contactors for safe and convenient operation.
| Business Type | Manufacturer, Exporter, Supplier |
| Country of Origin | India |
| Range | 0.010 to 22.000 |
| Repeatability Error | ± 0.002 |
| Max Error | ± 0.1% |
| Sample Weight | 5-50 gm |
| Overload Protection | Upto 100gm |
| Power Required | 220V AC, Single Phase |
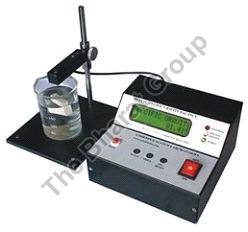
To get the specific gravity of your samples, it is the best digital solution available in the market. You can get the results just pressing a single button. This device is specially designed for testing laboratories with high accuracy and foolproof results.
This is the most advanced automatic Digital Specific Gravity Balance for laboratories, which can be used to take specific gravity of wood, rubber, metals, PVC, plastic, leather etc.
Just fix your sample and press the button and it will calculate the specific gravity of your sample automatically.
- 16 char X 2 lines big LCD display with green backlight
- Powder coated Mild Steel for long life
- Automatic calibration (through key pad for weigh scale)

